
AI Image Cleaner vs AI Image Humanizer: What's the Difference?
How to choose between cleanup, realism, enhancement, and manual editing.
Comparison queries are high intent because users are choosing which tool to use. This article clarifies when cleanup, humanization, realism, or general enhancement is the right choice.
A creator who used the wrong mode first
The image only needed edge and texture cleanup, but a heavy realism pass changed the mood too much. The better order was Clean first, then Realistic only for images that still lacked camera-like depth.
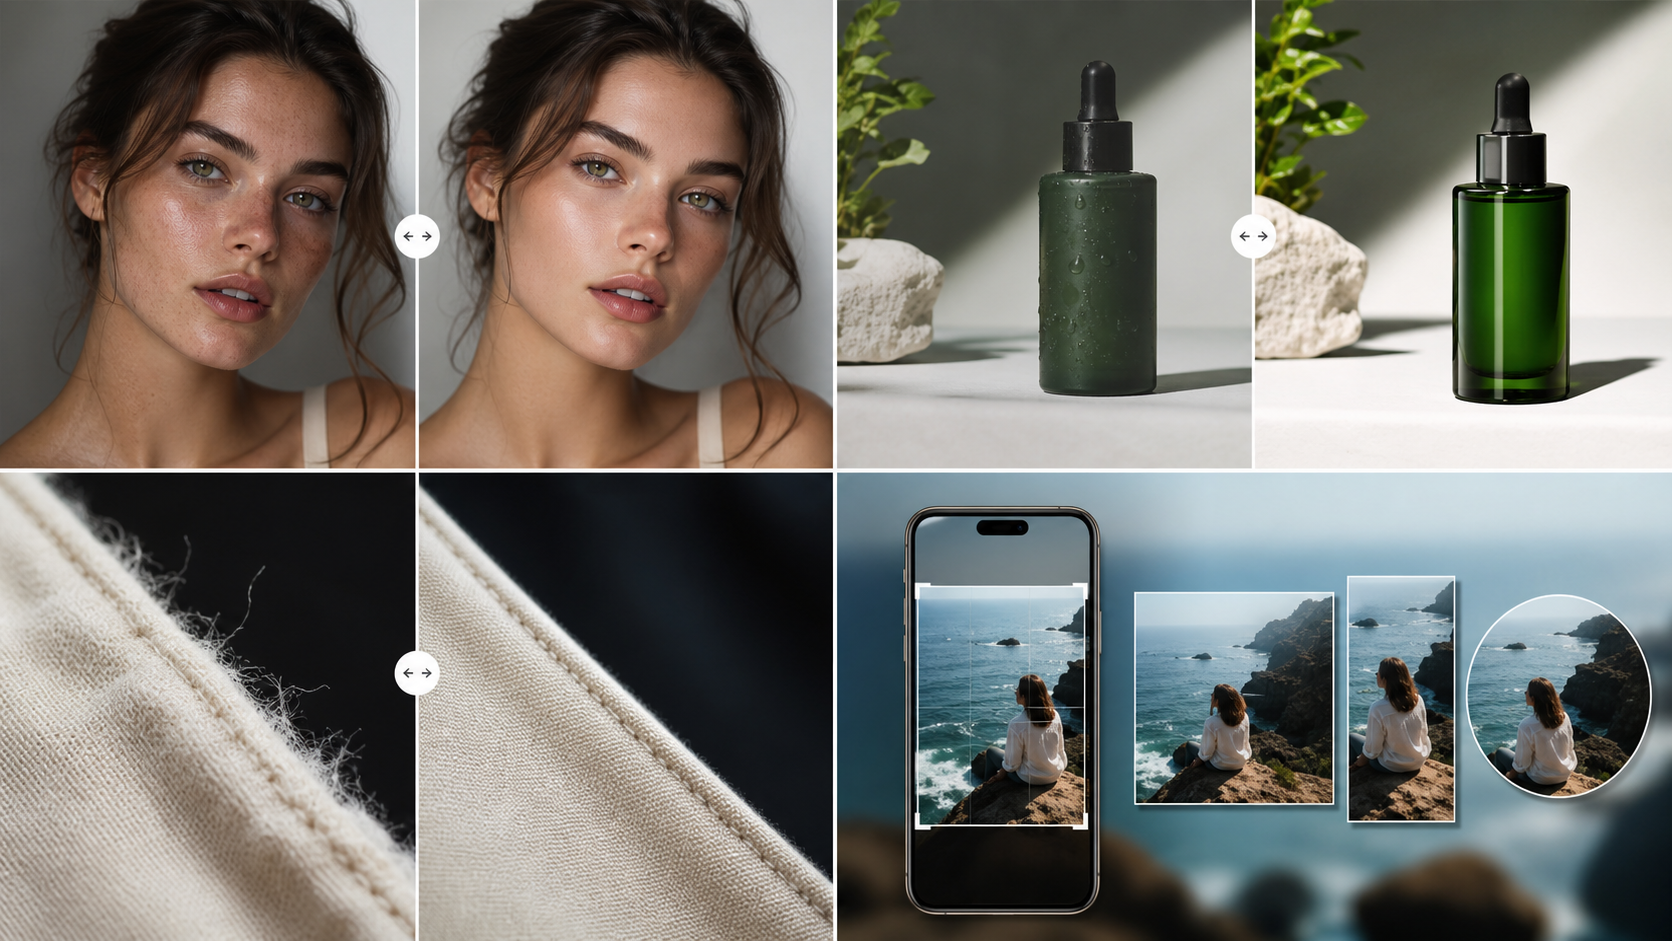
Use a cleaner for visible mess
Choose a cleaner when the image has rough edges, noisy backgrounds, warped accessories, or distracting texture glitches.
Use a humanizer for synthetic feel
Choose a humanizer when the image is technically good but feels too plastic, too smooth, or too obviously generated.
Use realism when the whole finish needs depth
A realism pass is stronger. Use it for portraits, product scenes, and campaign images that need a more photographic finish.
Pre-publishing checklist
- Name the problem before picking a mode.
- Use Clean for artifacts and edge repair.
- Use Humanizer for synthetic finish.
- Use Realistic for stronger camera-like output.
- Compare results before spending more credits.
Recommended workflow
- Start with Clean when unsure.
- Inspect the Before/After slider.
- Run Realistic only when the result needs more depth and natural light.